Troubleshooting Singer sewing machines can be straightforward with the right guide. Common issues like thread bunching, skipped stitches, and needle breakage can be resolved with simple steps. Regular maintenance, proper threading, and timely repairs are key to ensuring smooth operation. This guide provides practical solutions to help you identify and fix problems efficiently, keeping your Singer sewing machine in optimal condition for years to come.
Common Issues and Basic Solutions
Like any mechanical device, Singer sewing machines can encounter common issues that often have straightforward solutions. Frequent problems include thread bunching, skipped stitches, needle bending, thread breakage, bobbin thread issues, machine jamming, and stitch tension problems. Basic solutions involve re-threading the machine correctly, ensuring the needle is in good condition, checking thread tension, and performing regular maintenance. Sometimes, resetting the machine or consulting the user manual can resolve the issue quickly. Regular cleaning and lubrication also help prevent many of these problems, ensuring smooth operation and extending the machine’s lifespan effectively.
Thread Bunching Under the Needle
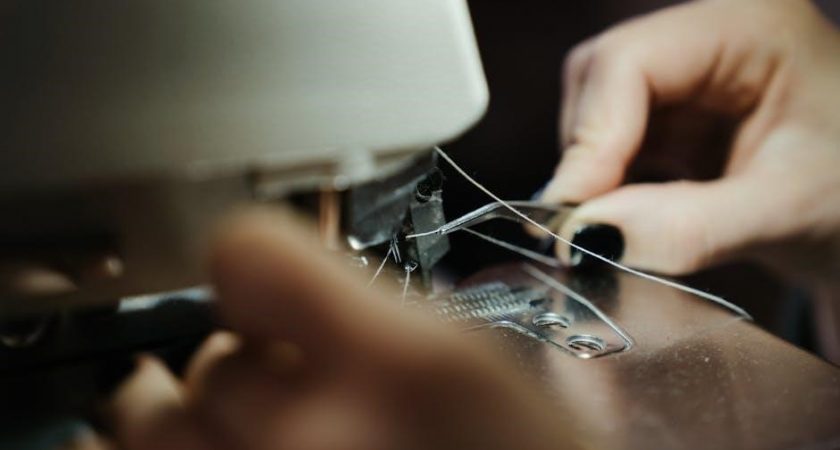
Thread bunching under the needle is a common issue that disrupts stitching. It often results from incorrect threading or improper tension settings, affecting fabric smoothness and stitch consistency.
Causes of Thread Bunching
Thread bunching under the needle is often caused by incorrect threading, improper tension settings, or using the wrong needle type. Additionally, a blunt or damaged needle can lead to poor thread flow, exacerbating the issue. Incorrect fabric handling, such as pulling too tightly, can also cause thread to gather underneath. Ensuring proper machine setup and regular maintenance can help prevent this common problem and maintain smooth stitching quality.
Solutions for Thread Bunching
To address thread bunching, re-thread the machine with the presser foot raised, ensuring the thread passes through the tension discs correctly. Adjust the thread tension to the recommended setting for your fabric type. Using the appropriate needle size and type is crucial. If issues persist, consult your machine’s manual for guidance or consider professional assistance to restore smooth stitching performance.
Skipped Stitches
Skipped stitches are often caused by a dull or damaged needle. Replace the needle and ensure proper thread tension and fabric handling to resolve the issue.
Why Stitches Are Skipped
Skipped stitches occur due to issues like a blunt or damaged needle, incorrect thread tension, or improper fabric handling. A dull needle fails to pierce fabric evenly, while loose tension allows the thread to slip, preventing stitch formation. Additionally, using the wrong needle size or type for the fabric can exacerbate the problem. Regular needle replacement and checking thread settings help prevent skipped stitches.
How to Fix Skipped Stitches
To fix skipped stitches, start by replacing the needle with a sharp, appropriate one for your fabric. Ensure proper thread tension by re-threading with the presser foot raised. Check for fabric puckering or dragging, and adjust your stitching speed. Clean the machine to remove lint or debris that might interfere. If issues persist, consult your Singer manual or visit a service center for professional assistance. Regular maintenance can help prevent skipped stitches and maintain consistent stitching quality.
Needle Bending or Breaking
Needle bending or breaking is often due to improper threading or using the wrong needle type. Replace with a sharp needle and ensure correct threading.
Reasons for Needle Damage
Needle bending or breaking is often caused by improper threading, using the wrong needle type, or a blunt needle. Incorrect needle size for fabric thickness and sewing speed can also damage the needle. Additionally, fabric bunching, machine misalignment, or hitting pins can cause breakage. Regularly replacing dull needles and ensuring proper machine setup can prevent such issues. Always use high-quality, compatible needles to maintain optimal performance and avoid unnecessary repairs.
Preventing Needle Breakage
Preventing needle breakage involves using the correct needle size and type for your fabric. Regularly replace dull or bent needles, as they can cause further damage. Always thread the machine with the presser foot up to ensure proper tension. Avoid sewing over pins and use a sharp, high-quality needle suitable for heavy use. Clean and oil your machine regularly to maintain smooth operation, reducing stress on the needle. Replace needles every 5-8 projects to prevent breakage and ensure consistent stitching quality.
Thread Breakage
Thread breakage often occurs due to incorrect tension, using the wrong needle size, or improper threading. Regularly check and adjust these elements to minimize interruptions during sewing.
Causes of Frequent Thread Breakage
Frequent thread breakage can stem from improper thread tension, using low-quality or incorrect thread type, or a blunt needle. Additionally, incorrect threading, a damaged bobbin case, or misaligned needle can cause issues. Tension discs not properly aligned or debris in the machine may also contribute. Ensuring the machine is clean and well-maintained can help prevent these problems. Always use the right needle size and high-quality thread to minimize breakage.
Fixing Thread Breakage Issues
To fix thread breakage, start by re-threading your machine with the presser foot raised, ensuring the thread passes through the tension disc correctly. Check for any debris or lint buildup and clean the machine thoroughly. Replace a blunt or damaged needle and ensure it’s the correct type for your fabric. Adjust the thread tension according to the fabric thickness and stitch type. Using high-quality thread can also prevent frequent breakage. If issues persist, consult a Singer service center for professional assistance.

Bobbin Thread Issues
Bobbin thread issues can disrupt stitching and cause machine jams. Proper threading, regular cleaning, and correct tension adjustments are essential for smooth operation and preventing thread breakage.
Causes of Bobbin Thread Problems
Bobbin thread issues often stem from incorrect installation, uneven tension, or poor-quality thread. Improper threading, lint buildup, or a damaged bobbin case can also cause breakage or tangles. Additionally, using the wrong needle size or type may lead to thread problems. Incorrect stitch settings or excessive fabric pull can further exacerbate these issues, disrupting the sewing process. Regular maintenance and proper threading techniques are essential to prevent such complications and ensure smooth stitching.
Solving Bobbin Thread Breakage
To address bobbin thread breakage, re-thread the machine with the presser foot raised, ensuring proper tension. Clean lint from the bobbin area and inspect for damage. Replace the bobbin case if necessary. Use high-quality thread and check stitch settings. Ensure the needle is correctly installed and compatible with your fabric. Regularly oil and maintain the machine to prevent friction. If issues persist, consult a professional for further assistance.
Machine Jamming
Machine jamming is a common issue that can disrupt sewing. Regular cleaning and oiling help prevent jams. Always re-thread properly and use compatible fabrics to avoid jams.
Why the Machine Jams
Machine jamming often occurs due to improper threading, using low-quality threads, or incorrect needle sizes; Neglecting regular cleaning can lead to dust buildup, causing mechanical parts to malfunction. Additionally, using fabrics that are too thick or dense can overload the machine, resulting in jams. Ensuring proper maintenance and using the right materials can significantly reduce the likelihood of such issues.
How to Unjam the Machine
To unjam your Singer sewing machine, start by turning it off and unplugging it for safety. Gently remove the jammed fabric without pulling forcefully. Check for tangled threads or debris around the bobbin area and carefully cut them with scissors. Re-thread the machine, ensuring the presser foot is up to maintain proper tension. If the issue persists, consult the user manual or visit a professional service center for assistance to avoid further damage.
Stitch Length and Tension Issues
Adjusting stitch length and thread tension ensures proper stitching. Incorrect settings can cause puckering or loose seams. Regularly check and adjust these settings for optimal results.
Adjusting Stitch Length
Adjusting stitch length is crucial for achieving the right fabric handling. Use the stitch length dial or button to increase or decrease the length. Longer stitches are ideal for thick fabrics, while shorter stitches suit delicate materials. Ensure proper thread tension to avoid puckering or loose seams. Always test adjustments on scrap fabric before sewing your final project; Refer to your Singer sewing machine manual for specific guidance, as settings may vary by model; Proper adjustment ensures professional-looking results every time.
Fixing Thread Tension Problems
Thread tension issues can cause uneven stitches or fabric puckering. To fix this, re-thread the machine with the presser foot raised, ensuring the thread passes through the tension discs correctly. Adjust the tension dials to balance the upper and lower thread. Test on scrap fabric by sewing a straight line. If problems persist, clean or replace the tension discs. Proper thread tension ensures smooth stitching and prevents fabric distortion, keeping your projects looking professional and well-finished.
Regular Maintenance Tips
Regular maintenance is crucial for optimal sewing machine performance. Clean the machine after every use, oil moving parts, and service it annually to prevent issues and extend its lifespan.
Cleaning the Machine
Cleaning is essential for maintaining your Singer sewing machine. Dust and lint accumulate inside, causing mechanical issues. Use a soft brush to remove debris from the bobbin area and tension discs. Avoid harsh chemicals; instead, wipe surfaces with a damp cloth. Regular cleaning prevents jams, ensures smooth operation, and extends the machine’s lifespan. It’s recommended to clean after every project or when you notice a buildup of lint and thread fragments.
Oil and Lubrication
Regular oil and lubrication are crucial for your Singer sewing machine. Apply a few drops of sewing machine oil to the hook area and moving parts every 1-2 months. Avoid over-lubrication, as excess oil can attract lint and dust, leading to further issues. Use high-quality sewing machine oil to ensure smooth operation. Proper lubrication prevents mechanical friction, reduces noise, and extends the machine’s lifespan. Always refer to your manual for specific oil application points to maintain optimal performance and prevent potential damage.

When to Seek Professional Help
Visit a Singer service center if issues persist after basic troubleshooting. Severe damage, internal mechanical problems, or complex repairs require professional expertise to ensure proper machine functionality and longevity.
Knowing When to Visit a Service Center
If your Singer sewing machine experiences persistent issues like severe jamming, broken gears, or electrical malfunctions despite basic troubleshooting, it’s time to seek professional help. Visit an authorized Singer service center for complex repairs, ensuring your machine is restored to optimal functionality by skilled technicians. This prevents further damage and extends the machine’s lifespan, maintaining its performance and reliability for future projects.
Preparing for Professional Repair
Before visiting a service center, unplug your Singer machine and remove any accessories. Pack the sewing machine, along with its original accessories and a detailed note of the issues encountered; Ensure you have your warranty information ready if applicable. It’s also advisable to call ahead to confirm any specific requirements. This preparation ensures a smooth and efficient repair process, helping technicians diagnose and resolve the problem quickly.